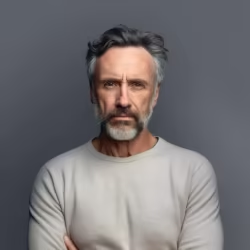
A practical guide to natural street portrait poses: walking, leaning, sitting, hands, bags, city surfaces, calm direction, and public-space awareness.
To pose in street photography, give the person a small action and let the surroundings carry part of the picture. Walk at an unhurried pace, lean lightly, sit where it is permitted and out of the way, look past the lens, adjust a cuff, hold a bag strap, or pause beside a wall or window. Keep the shoulders easy, the hands occupied without gripping, and the direction brief. A street portrait should feel connected to a real place, not like a studio pose misplaced on a pavement. Not every street photograph needs posing; the best approach depends on whether you are making a portrait, observing a candid moment, or doing something between the two.
A wall gives the body an honest point of contact. The picture still belongs to the street because the light, pavement, and distance remain present.
Street posing is a conversation with the place
A studio lets a photographer remove variables: light, background, temperature, passersby, and pace. On the street, those variables become part of the portrait. A narrow lane can make walking feel purposeful. A row of steps can offer a seated pause. Window glass can give the face a second, quieter presence. The useful question is not, 'What pose should this person do?' It is, 'What can this person do here that already makes sense?' That shift prevents the brittle, over-arranged look that makes urban portraits feel borrowed from a posing chart.
Street condition
What it changes
A useful response
Changing light
Sun, shade, headlights, and reflections can change the face in seconds.
Set a simple mark or path, then photograph through the natural variation.
Public movement
The location belongs to other people as well as the session.
Keep pathways clear and use short intervals rather than claiming a spot.
Architecture
Walls, doors, steps, railings, and glass can supply line and contact.
Choose one surface with a reason, then keep the interaction gentle.
Ambient noise
Long, complicated directions are easy to lose.
Use one cue at a time: walk, pause, look left, soften the hand.
A less controlled frame
A perfect pose can be interrupted by a cyclist, bus, or crowd.
Treat interruption as normal and move on; do not force the scene to obey.
A quick street posing checklist
Pick a location with room to stand, walk, or pause without obstructing anyone.
Start with an action that fits the site: a slow walk, a lean, a seated pause, or looking through a window.
Set the feet before fine-tuning the hands; locked feet often travel upward into tense shoulders.
Give the eyes a destination: the lens, a shopfront, a cross street, a patch of light, or a point just beyond camera.
Give each hand light contact with clothing, a bag, a railing, a book, or a pocket edge.
Photograph the transitions, not only the frozen end position.
Reset often. A breath, a few steps, or a look away can restore expression faster than another instruction.
Move before the location becomes inconvenient, crowded, or uncomfortable for the subject.
Walking poses: give the body somewhere to go
Walking is one of the least theatrical street photography poses because it gives the body a sequence to follow. Ask the subject to walk a short, safe stretch at their ordinary speed, then vary only the gaze or one hand. They can look toward the end of the block, glance at a storefront, touch a jacket front, or let an arm swing naturally. Do not ask for exaggerated strides unless the picture is deliberately fashion-led. Small steps and a calm pace produce cleaner shoulders, hands, and expressions.
A walking prompt gives the subject a task and gives the photographer several unforced moments: stride, pause, gaze shift, and jacket adjustment.
Prompt
Best for
Photographer's watch point
Walk to the next doorway, then stop on the front foot.
Full-body portraits and quieter commercial work.
Keep enough distance for the whole stride and check the path is clear.
Adjust your cuff once, then let the hand fall.
Hands that need a reason without becoming a performance.
Catch the release, not only the adjustment.
Look across the street for two frames, then back toward me.
Expression variety with minimal body movement.
Watch the light change across the face.
Take three slow steps, breathe out, and pause.
People who feel stiff in a fixed pose.
Do not let the prompt pull the subject toward traffic or other hazards.
Leaning, sitting, and looking away without going blank
Static poses work best when there is an actual resting point. A shoulder near a wall, a forearm on a railing, or a seated position on a wide public step can settle the frame. Keep the contact light. A person pressed flat against a wall often looks stranded; a person who has simply paused there looks plausible. Looking away helps, too, but choose a precise off-camera target so the gaze has a small narrative rather than a vacant drift.
Seated poses need a usable public spot and a brief session rhythm. Leave the stairs clear and move on when others need the space.
For a wall lean, place one shoulder or one hand near the surface rather than flattening the whole body against it.
For steps, turn the body slightly, rest an arm on a knee, and keep hands soft around a small object or bag strap.
For railings, use fingertips or a forearm for balance only when the railing is safe and does not restrict access.
For an off-camera gaze, give a real target: the corner, the light, an arriving friend, or the photographer's raised hand.
For a still portrait, ask for one gentle change between frames: chin, shoulders, breath, or eye line.
Glass can add a second plane to a portrait. Keep the subject's reflection intentional and watch for distracting glare.
Hands, jackets, bags, walls, and city props
The street gives hands more honest work than a blank backdrop does. A jacket lapel, cross-body bag, tote handle, backpack strap, book, coffee cup, or camera strap can be enough. The important part is pressure: touch, do not clamp. One hand can hold the strap while the other remains lower; one thumb can rest at a pocket edge while the other hand adjusts a cuff. For a deeper hand-by-hand guide, see where to put your hands in photos.
A bag strap gives the hands a believable task. Let one hand hold it gently and let the other hand have a different, quieter role.
Street element
How to use it
What to avoid
Jacket or coat
Touch a lapel, cuff, collar, or hem once, then release.
Pulling fabric hard or repeating the same adjustment for every frame.
Bag or backpack
Rest a hand on the strap or handle with relaxed fingers.
Using the bag as a shield when the goal is an open portrait.
Wall or column
Use it as a gentle shoulder, hip, or hand contact point.
Leaning on fragile surfaces, private entrances, or places with clear restrictions.
Steps or curb edge
Make a brief seated or perched pose only where it is safe and allowed.
Blocking a route, sitting in a roadway, or treating an access ramp as a prop.
Window glass
Use reflection as a secondary composition, then check the background twice.
Photographing through or toward private interiors without permission.
How photographers can direct without making the portrait feel staged
Street direction works when it is brief, observable, and kind. Demonstrate an action on your own body when that helps. Change one element at a time. Say what you are seeing in the frame: light on the face, a clean shoulder line, a better hand shape, room around the head. Do not diagnose the person as awkward or stiff. Give them an action they can complete, then let them move through it in their own way. The camera should follow the person more often than it commands them.
Say, "Walk to that doorway and look across the street," instead of, "Act natural."
Say, "Let your fingers rest on the strap," instead of, "Your hands look awkward."
Say, "Can you angle one shoulder toward the wall?" instead of giving a full-body correction all at once.
Ask before moving close, adjusting clothing, or touching hair or skin. Verbal direction and demonstration are usually enough.
Offer choices: walking or sitting, direct gaze or looking away, a quiet frame or a more animated one.
Show a strong frame when it will build confidence, then keep the session in motion.
Public-space safety, privacy, and respect
Street portraiture is not a permit to rearrange public life. Work away from traffic, tracks, construction, private entrances, and crowded pinch points. Keep sidewalks, stairs, ramps, shop doors, and building access open. Check for changing conditions: rain-slick pavement, cyclists, delivery vehicles, security requests, or a crowd gathering around the session. Laws and permissions vary by place, so this is practical guidance rather than legal advice. When a location is uncertain, ask the property owner or choose another frame. Strangers are people moving through their own day, not background furniture to be directed or delayed.
A respectful street-session rule
If the picture requires blocking access, stepping into traffic, ignoring a request to move, or treating strangers as props, choose a different picture. The location should add life to the portrait, not create a problem for someone else. For location-led shooting ideas that keep the street in view, visit Gampi's Street Photography page.
Choose final street portraits for movement and meaning
A finished street set benefits from range: a walking frame, a quieter wall or window portrait, a seated image if the location allowed it, a close hand detail, and one frame where the city genuinely matters. Compare near-duplicates for hand tension, eye direction, awkward background collisions, and whether the person still looks like themselves. For more pose families beyond the city, explore how to pose people naturally in photos, contrast this looser approach with how to pose in studio photography.
Editing reveals whether the set has cadence: not six versions of one pose, but a sequence with movement, stillness, and a sense of place.
Keep the final street set clear and considered
After narrowing the session to the frames with the best movement and connection, use Gampi to present a tidy street-portrait gallery without burying the strongest images among near-duplicates.
Frequently asked questions
How do you pose for street photography?
Start with an action that fits the place: walk a short clear path, lean lightly, pause beside a wall, sit where it is safe and permitted, or look toward a real point off camera. Keep directions small, give hands gentle contact with clothing or a bag, and photograph the movement between poses.
What are natural street photo poses?
Natural street poses include walking, adjusting a cuff, holding a bag strap, resting near a wall, sitting on broad public steps, looking through reflective glass, or turning toward a patch of light. They work because the location gives the body a believable reason to move or pause.
What should I do with my hands in street photos?
Give your hands a small job: touch a jacket edge, rest fingers on a bag strap, hold a book or cup, use part of a pocket, let one arm swing while walking, or rest a hand on a knee while seated. Use light pressure rather than a hard grip.
How do photographers pose people in urban locations?
Photographers can choose an uncluttered, safe location and offer one prompt at a time: walk to the next doorway, look across the street, touch the strap, or settle one shoulder near the wall. Clear verbal cues, demonstrations, and frequent resets keep the portrait more natural than long lists of corrections.
How do street portraits look candid?
Street portraits look candid when the subject has a real action, the pose fits the setting, and the photographer shoots transitions instead of only fixed positions. Candid does not mean pretending someone was not photographed; a relaxed directed portrait can still feel spontaneous and honest.
A practical pose library for photo shoots: standing, seated, walking, hand placement, couples, families, maternity, studio sessions, street portraits, and easy resets.
A practical beginner guide to stronger photo composition with subject placement, rule of thirds, lines, frames, negative space, balance, backgrounds, and genre examples.
A confidence-first guide to seated portrait poses: support, posture, hands, legs, chairs, steps, floors, sofas, studio sessions, maternity photos, family pictures, and easy resets.